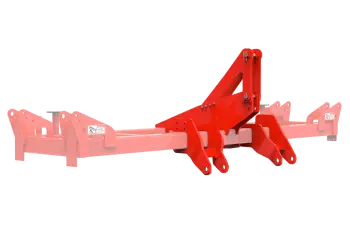
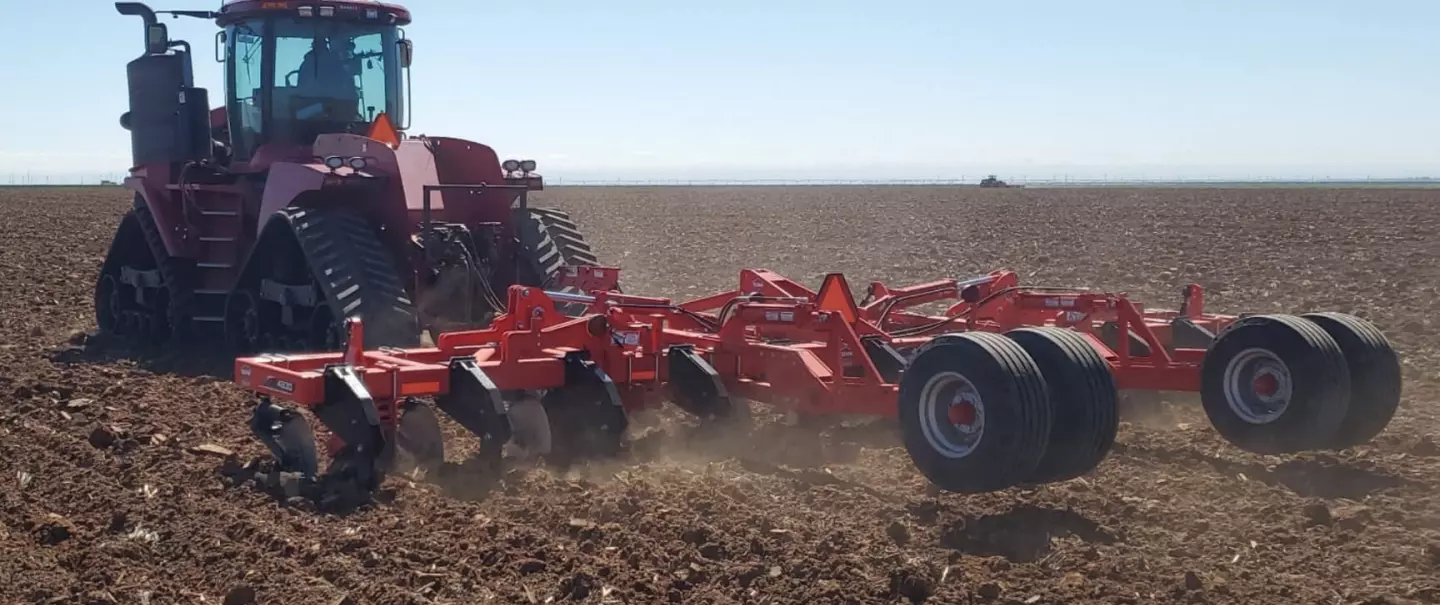
| Not Applicable | Not Applicable | Drawbar Pull Hitch with Rear Lift Wheels, Includes (2) 280/70R15" Tires, Singles, (2) 280/70R15" Front Mounted Gauge Wheels, (1) 4" x 16" and (1) 4-½" x 16" Cylinder, Color-Coded Hydraulic Hose Grips, All Hydraulic Hoses, Tongue Jack, CAT III or CAT IV Hitch, Safety Chain (Less Parking Stands) | Drawbar Pull Hitch with Rear Lift Wheels, Includes (2) 280/70R15" Tires, Singles, (2) 280/70R15" Front Mounted Gauge Wheels, (1) 4" x 16" and (1) 4-½" x 16" Cylinder, Color-Coded Hydraulic Hose Grips, All Hydraulic Hoses, Tongue Jack, CAT III or CAT IV Hitch, Safety Chain (Less Parking Stands) | Drawbar Pull Hitch with Rear Lift Wheels, Includes (2) 280/70R15" Tires, Singles, (2) 280/70R15" Front Mounted Gauge Wheels, (1) 4" x 16" and (1) 4-½" x 16" Cylinder, Color-Coded Hydraulic Hose Grips, All Hydraulic Hoses, Tongue Jack, CAT III or CAT IV Hitch, Safety Chain (Less Parking Stands) | Drawbar Pull Hitch with Rear Lift Wheels, Includes (2) 280/70R15" Tires, Singles, (2) 280/70R15" Front Mounted Gauge Wheels, (1) 4" x 16" and (1) 4-½" x 16" Cylinder, Color-Coded Hydraulic Hose Grips, All Hydraulic Hoses, Tongue Jack, CAT III or CAT IV Hitch, Safety Chain (Less Parking Stands) | Drawbar Pull Hitch with Rear Lift Wheels, Includes (2) 280/70R15" Tires, Singles, (2) 280/70R15" Front Mounted Gauge Wheels, (1) 4" x 16" and (1) 4-½" x 16" Cylinder, Color-Coded Hydraulic Hose Grips, All Hydraulic Hoses, Tongue Jack, CAT III or CAT IV Hitch, Safety Chain (Less Parking Stands) | Drawbar Pull Hitch with Rear Lift Wheels, Includes (4) 280/70R15" Tires, Duals, (2) 280/70R15" Front Mounted Gauge Wheels, (1) 4" x 16" and (1) 4-½" x 16" Cylinder, Color-Coded Hydraulic Hose Grips, All Hydraulic Hoses, Tongue Jack, CAT III or CAT IV Hitch, Safety Chain (Less Parking Stands) | Drawbar Pull Hitch with Rear Lift Wheels, Includes (2) 280/70R15" Tires, Singles, (2) 280/70R15" Front Mounted Gauge Wheels, (1) 4" x 16" and (1) 4-½" x 16" Cylinder, Color-Coded Hydraulic Hose Grips, All Hydraulic Hoses, Tongue Jack, CAT III or CAT IV Hitch, Safety Chain (Less Parking Stands) | Drawbar Pull Hitch with Rear Lift Wheels, Includes (4) 280/70R15" Tires, Duals, (2) 280/70R15" Front Mounted Gauge Wheels, (1) 4" x 16" and (1) 4-½" x 16" Cylinder, Color-Coded Hydraulic Hose Grips, All Hydraulic Hoses, Tongue Jack, CAT III or CAT IV Hitch, Safety Chain (Less Parking Stands) | Drawbar Pull Hitch with Rear Lift Wheels, Includes (4) 280/70R15" Tires, Duals, (4) 280/70R15" Front Mounted Gauge Wheels, (1) 4" x 16" and (1) 4-½" x 16" Cylinder, Color-Coded Hydraulic Hose Grips, All Hydraulic Hoses, Tongue Jack, CAT IV or CAT V Hitch, Safety Chain (Less Parking Stands) | Drawbar Pull Hitch with Rear Lift Wheels, Includes (4) 280/70R15" Tires, Duals, (4) 280/70R15" Front Mounted Gauge Wheels, (1) 4" x 16" and (1) 4-½" x 16" Cylinder, Color-Coded Hydraulic Hose Grips, All Hydraulic Hoses, Tongue Jack, CAT IV or CAT V Hitch, Safety Chain (Less Parking Stands) | Drawbar Pull Hitch with Rear Lift Wheels, Includes (4) 280/70R15" Tires, Duals, (4) 280/70R15" Front Mounted Gauge Wheels, (1) 4" x 16" and (1) 4-½" x 16" Cylinder, Color-Coded Hydraulic Hose Grips, All Hydraulic Hoses, Tongue Jack, CAT IV or CAT V Hitch, Safety Chain (Less Parking Stands) | Drawbar Pull Hitch with Rear Lift Wheels, Includes (4) 280/70R15" Tires, Duals, (4) 280/70R15" Front Mounted Gauge Wheels, (1) 4" x 16" and (1) 4-½" x 16" Cylinder, Color-Coded Hydraulic Hose Grips, All Hydraulic Hoses, Tongue Jack, CAT IV or CAT V Hitch, Safety Chain (Less Parking Stands) | Drawbar Pull Hitch with Rear Lift Wheels, Includes (4) 280/70R15" Tires, Duals, (4) 280/70R15" Front Mounted Gauge Wheels, (1) 4" x 16" and (1) 4-½" x 16" Cylinder, Color-Coded Hydraulic Hose Grips, All Hydraulic Hoses, Tongue Jack, CAT IV or CAT V Hitch, Safety Chain (Less Parking Stands) |
| Rigid: Shear-Bolt Protected, 10,000 lb (Shear Force) | Rigid: Shear-Bolt Protected, 10,000 lb (Shear Force) | Rigid: Shear-Bolt Protected, 10,000 lb (Shear Force) | Rigid: Shear-Bolt Protected, 10,000 lb (Shear Force) | Rigid: Shear-Bolt Protected, 10,000 lb (Shear Force) | Rigid: Shear-Bolt Protected, 10,000 lb (Shear Force) | Rigid: Shear-Bolt Protected, 10,000 lb (Shear Force) | Rigid: Shear-Bolt Protected, 10,000 lb (Shear Force) | Rigid: Shear-Bolt Protected, 10,000 lb (Shear Force) | Rigid: Shear-Bolt Protected, 10,000 lb (Shear Force) | Rigid: Shear-Bolt Protected, 10,000 lb (Shear Force) | Rigid: Shear-Bolt Protected, 10,000 lb (Shear Force) | Rigid: Shear-Bolt Protected, 10,000 lb (Shear Force) | Rigid: Shear-Bolt Protected, 10,000 lb (Shear Force) | Rigid: Shear-Bolt Protected, 10,000 lb (Shear Force) |
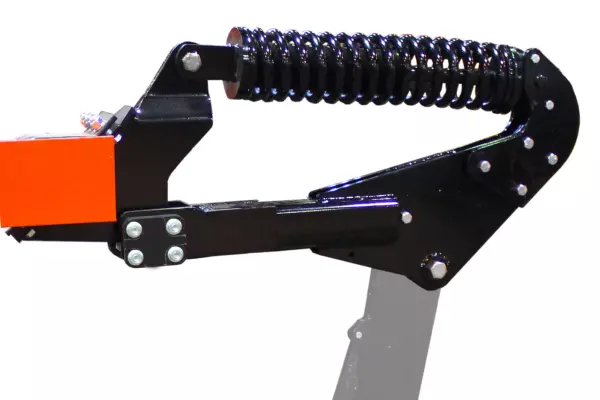
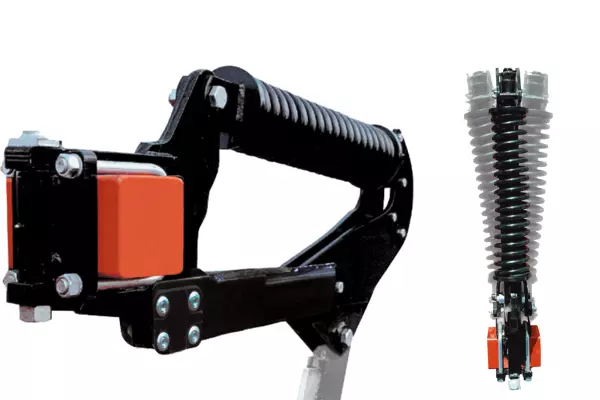
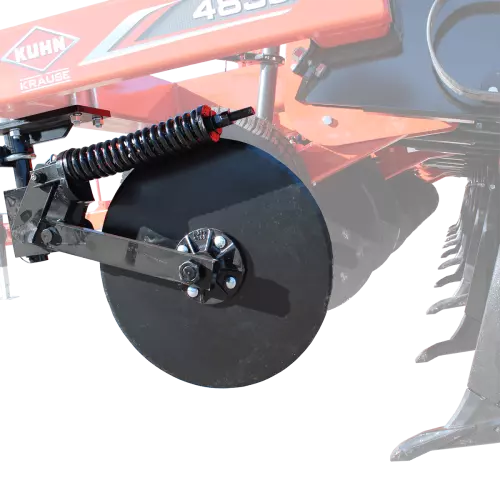
| Pivoting PathFind'r™ Spring Reset, 2,500 lb (Not Compatible with Pull Hitch) | Pivoting PathFind'r™ Spring Reset, 2,500 lb (Not Compatible with Pull Hitch) | Pivoting PathFind'r™ Spring Reset, 2,500 lb (Not Compatible with Pull Hitch) | Pivoting PathFind'r™ Spring Reset, 2,500 lb (Not Compatible with Pull Hitch) | Pivoting PathFind'r™ Spring Reset, 2,500 lb (Not Compatible with Pull Hitch) | Pivoting PathFind'r™ Spring Reset, 2,500 lb (Not Compatible with Pull Hitch) | Pivoting PathFind'r™ Spring Reset, 2,500 lb (Not Compatible with Pull Hitch) | Pivoting PathFind'r™ Spring Reset, 2,500 lb (Not Compatible with Pull Hitch) | Pivoting PathFind'r™ Spring Reset, 2,500 lb (Not Compatible with Pull Hitch) | Pivoting PathFind'r™ Spring Reset, 2,500 lb (Not Compatible with Pull Hitch) | Pivoting PathFind'r™ Spring Reset, 2,500 lb (Not Compatible with Pull Hitch) | Pivoting PathFind'r™ Spring Reset, 2,500 lb (Not Compatible with Pull Hitch) | Pivoting PathFind'r™ Spring Reset, 2,500 lb (Not Compatible with Pull Hitch) | Pivoting PathFind'r™ Spring Reset, 2,500 lb (Not Compatible with Pull Hitch) | Pivoting PathFind'r™ Spring Reset, 2,500 lb (Not Compatible with Pull Hitch) |
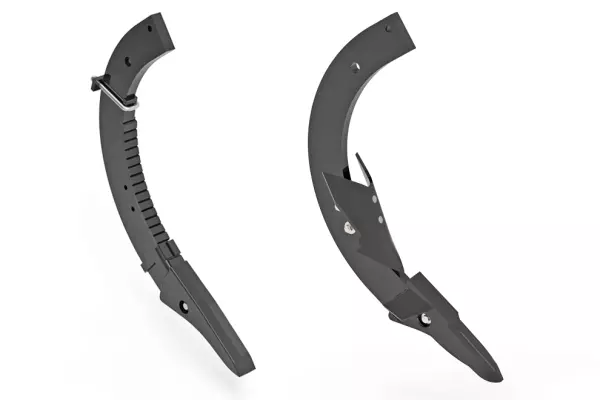
| MRD Shank, 1-¼" Thick (Minimum Residue Disturbance), Austempered Wear Bar | MRD Shank, 1-¼" Thick (Minimum Residue Disturbance), Austempered Wear Bar | MRD Shank, 1-¼" Thick (Minimum Residue Disturbance), Austempered Wear Bar | MRD Shank, 1-¼" Thick (Minimum Residue Disturbance), Austempered Wear Bar | MRD Shank, 1-¼" Thick (Minimum Residue Disturbance), Austempered Wear Bar | MRD Shank, 1-¼" Thick (Minimum Residue Disturbance), Austempered Wear Bar | MRD Shank, 1-¼" Thick (Minimum Residue Disturbance), Austempered Wear Bar | MRD Shank, 1-¼" Thick (Minimum Residue Disturbance), Austempered Wear Bar | MRD Shank, 1-¼" Thick (Minimum Residue Disturbance), Austempered Wear Bar | MRD Shank, 1-¼" Thick (Minimum Residue Disturbance), Austempered Wear Bar | MRD Shank, 1-¼" Thick (Minimum Residue Disturbance), Austempered Wear Bar | MRD Shank, 1-¼" Thick (Minimum Residue Disturbance), Austempered Wear Bar | MRD Shank, 1-¼" Thick (Minimum Residue Disturbance), Austempered Wear Bar | MRD Shank, 1-¼" Thick (Minimum Residue Disturbance), Austempered Wear Bar | MRD Shank, 1-¼" Thick (Minimum Residue Disturbance), Austempered Wear Bar |
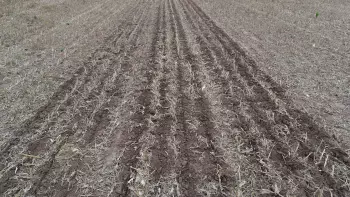
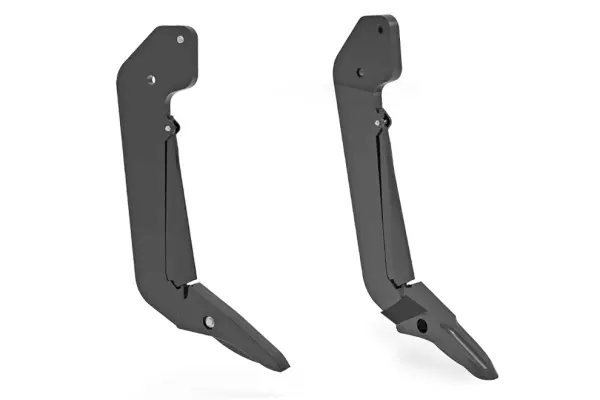
| HD No-Till Shank, 1" Thick (Low Surface Disturbance), Austempered Wear Bar, Chromium Carbide Shank Side Protectors | HD No-Till Shank, 1" Thick (Low Surface Disturbance), Austempered Wear Bar, Chromium Carbide Shank Side Protectors | HD No-Till Shank, 1" Thick (Low Surface Disturbance), Austempered Wear Bar, Chromium Carbide Shank Side Protectors | HD No-Till Shank, 1" Thick (Low Surface Disturbance), Austempered Wear Bar, Chromium Carbide Shank Side Protectors | HD No-Till Shank, 1" Thick (Low Surface Disturbance), Austempered Wear Bar, Chromium Carbide Shank Side Protectors | HD No-Till Shank, 1" Thick (Low Surface Disturbance), Austempered Wear Bar, Chromium Carbide Shank Side Protectors | HD No-Till Shank, 1" Thick (Low Surface Disturbance), Austempered Wear Bar, Chromium Carbide Shank Side Protectors | HD No-Till Shank, 1" Thick (Low Surface Disturbance), Austempered Wear Bar, Chromium Carbide Shank Side Protectors | HD No-Till Shank, 1" Thick (Low Surface Disturbance), Austempered Wear Bar, Chromium Carbide Shank Side Protectors | HD No-Till Shank, 1" Thick (Low Surface Disturbance), Austempered Wear Bar, Chromium Carbide Shank Side Protectors | HD No-Till Shank, 1" Thick (Low Surface Disturbance), Austempered Wear Bar, Chromium Carbide Shank Side Protectors | HD No-Till Shank, 1" Thick (Low Surface Disturbance), Austempered Wear Bar, Chromium Carbide Shank Side Protectors | HD No-Till Shank, 1" Thick (Low Surface Disturbance), Austempered Wear Bar, Chromium Carbide Shank Side Protectors | HD No-Till Shank, 1" Thick (Low Surface Disturbance), Austempered Wear Bar, Chromium Carbide Shank Side Protectors | HD No-Till Shank, 1" Thick (Low Surface Disturbance), Austempered Wear Bar, Chromium Carbide Shank Side Protectors |
| Parabolic Shank, 1-¼" Thick, Chromium Carbide Wear Bar or 6" Coverboard Option | Parabolic Shank, 1-¼" Thick, Chromium Carbide Wear Bar or 6" Coverboard Option | Parabolic Shank, 1-¼" Thick, Chromium Carbide Wear Bar or 6" Coverboard Option | Parabolic Shank, 1-¼" Thick, Chromium Carbide Wear Bar or 6" Coverboard Option | Parabolic Shank, 1-¼" Thick, Chromium Carbide Wear Bar or 6" Coverboard Option | Parabolic Shank, 1-¼" Thick, Chromium Carbide Wear Bar or 6" Coverboard Option | Parabolic Shank, 1-¼" Thick, Chromium Carbide Wear Bar or 6" Coverboard Option | Parabolic Shank, 1-¼" Thick, Chromium Carbide Wear Bar or 6" Coverboard Option | Parabolic Shank, 1-¼" Thick, Chromium Carbide Wear Bar or 6" Coverboard Option | Parabolic Shank, 1-¼" Thick, Chromium Carbide Wear Bar or 6" Coverboard Option | Parabolic Shank, 1-¼" Thick, Chromium Carbide Wear Bar or 6" Coverboard Option | Parabolic Shank, 1-¼" Thick, Chromium Carbide Wear Bar or 6" Coverboard Option | Parabolic Shank, 1-¼" Thick, Chromium Carbide Wear Bar or 6" Coverboard Option | Parabolic Shank, 1-¼" Thick, Chromium Carbide Wear Bar or 6" Coverboard Option | Parabolic Shank, 1-¼" Thick, Chromium Carbide Wear Bar or 6" Coverboard Option |
| Double K® 2" Chromium Carbide Points (No-Till Shank Only) | Double K® 2" Chromium Carbide Points (No-Till Shank Only) | Double K® 2" Chromium Carbide Points (No-Till Shank Only) | Double K® 2" Chromium Carbide Points (No-Till Shank Only) | Double K® 2" Chromium Carbide Points (No-Till Shank Only) | Double K® 2" Chromium Carbide Points (No-Till Shank Only) | Double K® 2" Chromium Carbide Points (No-Till Shank Only) | Double K® 2" Chromium Carbide Points (No-Till Shank Only) | Double K® 2" Chromium Carbide Points (No-Till Shank Only) | Double K® 2" Chromium Carbide Points (No-Till Shank Only) | Double K® 2" Chromium Carbide Points (No-Till Shank Only) | Double K® 2" Chromium Carbide Points (No-Till Shank Only) | Double K® 2" Chromium Carbide Points (No-Till Shank Only) | Double K® 2" Chromium Carbide Points (No-Till Shank Only) | Double K® 2" Chromium Carbide Points (No-Till Shank Only) |
| Double K® 7" Wing Ripper Points | Double K® 7" Wing Ripper Points | Double K® 7" Wing Ripper Points | Double K® 7" Wing Ripper Points | Double K® 7" Wing Ripper Points | Double K® 7" Wing Ripper Points | Double K® 7" Wing Ripper Points | Double K® 7" Wing Ripper Points | Double K® 7" Wing Ripper Points | Double K® 7" Wing Ripper Points | Double K® 7" Wing Ripper Points | Double K® 7" Wing Ripper Points | Double K® 7" Wing Ripper Points | Double K® 7" Wing Ripper Points | Double K® 7" Wing Ripper Points |
| Double K® 2-½" Straight Ripper Point | Double K® 2-½" Straight Ripper Point | Double K® 2-½" Straight Ripper Point | Double K® 2-½" Straight Ripper Point | Double K® 2-½" Straight Ripper Point | Double K® 2-½" Straight Ripper Point | Double K® 2-½" Straight Ripper Point | Double K® 2-½" Straight Ripper Point | Double K® 2-½" Straight Ripper Point | Double K® 2-½" Straight Ripper Point | Double K® 2-½" Straight Ripper Point | Double K® 2-½" Straight Ripper Point | Double K® 2-½" Straight Ripper Point | Double K® 2-½" Straight Ripper Point | Double K® 2-½" Straight Ripper Point |
| Low Disturbance Shank Cap (In Lieu of Wing) | Low Disturbance Shank Cap (In Lieu of Wing) | Low Disturbance Shank Cap (In Lieu of Wing) | Low Disturbance Shank Cap (In Lieu of Wing) | Low Disturbance Shank Cap (In Lieu of Wing) | Low Disturbance Shank Cap (In Lieu of Wing) | Low Disturbance Shank Cap (In Lieu of Wing) | Low Disturbance Shank Cap (In Lieu of Wing) | Low Disturbance Shank Cap (In Lieu of Wing) | Low Disturbance Shank Cap (In Lieu of Wing) | Low Disturbance Shank Cap (In Lieu of Wing) | Low Disturbance Shank Cap (In Lieu of Wing) | Low Disturbance Shank Cap (In Lieu of Wing) | Low Disturbance Shank Cap (In Lieu of Wing) | Low Disturbance Shank Cap (In Lieu of Wing) |
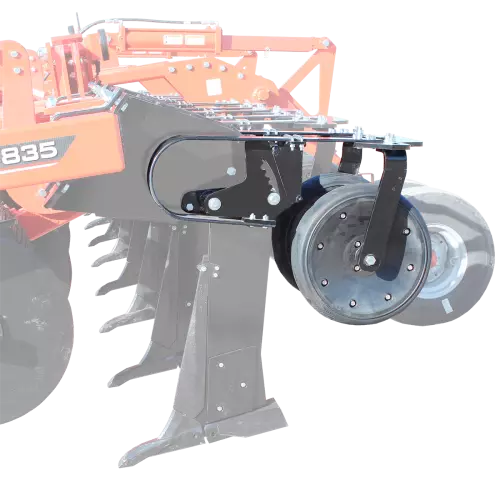
| Not Applicable | Not Applicable | Not Applicable | Not Applicable | (2) 20.5" x 8", Load Range E (One per Wing) | (2) 20.5" x 8", Load Range E (One per Wing) | (2) 20.5" x 8", Load Range E (One per Wing) | (2) 20.5" x 8", Load Range E (One per Wing) | (2)" x 8", Load Range E (One per Wing) | (2) 20.5" x 8", Load Range E (One per Wing) | (2) 20.5" x 8", Load Range E (One per Wing) | (2) 20.5" x 8", Load Range E (One per Wing) | (2) 20.5" x 8", Load Range E (One per Wing) | (2) 20.5" x 8", Load Range E (One per Wing) | (2) 20.5" x 8", Load Range E (One per Wing) |
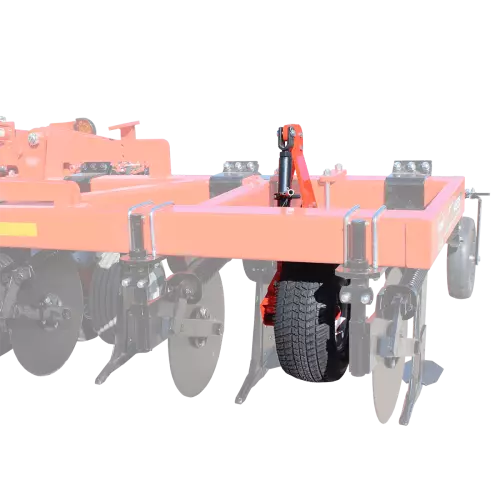
| (2) 4 x 16" Smooth Closing Wheels per Shank, Adjustable Spring Tension (Limit Shank Soil Blowout) | (2) 4 x 16" Smooth Closing Wheels per Shank, Adjustable Spring Tension (Limit Shank Soil Blowout) | (2) 4 x 16" Smooth Closing Wheels per Shank, Adjustable Spring Tension (Limit Shank Soil Blowout) | (2) 4 x 16" Smooth Closing Wheels per Shank, Adjustable Spring Tension (Limit Shank Soil Blowout) | (2) 4 x 16" Smooth Closing Wheels per Shank, Adjustable Spring Tension (Limit Shank Soil Blowout) | (2) 4 x 16" Smooth Closing Wheels per Shank, Adjustable Spring Tension (Limit Shank Soil Blowout) | (2) 4 x 16" Smooth Closing Wheels per Shank, Adjustable Spring Tension (Limit Shank Soil Blowout) | (2) 4 x 16" Smooth Closing Wheels per Shank, Adjustable Spring Tension (Limit Shank Soil Blowout) | (2) 4 x 16" Smooth Closing Wheels per Shank, Adjustable Spring Tension (Limit Shank Soil Blowout) | (2) 4 x 16" Smooth Closing Wheels per Shank, Adjustable Spring Tension (Limit Shank Soil Blowout) | (2) 4 x 16" Smooth Closing Wheels per Shank, Adjustable Spring Tension (Limit Shank Soil Blowout) | (2) 4 x 16" Smooth Closing Wheels per Shank, Adjustable Spring Tension (Limit Shank Soil Blowout) | (2) 4 x 16" Smooth Closing Wheels per Shank, Adjustable Spring Tension (Limit Shank Soil Blowout) | (2) 4 x 16" Smooth Closing Wheels per Shank, Adjustable Spring Tension (Limit Shank Soil Blowout) | (2) 4 x 16" Smooth Closing Wheels per Shank, Adjustable Spring Tension (Limit Shank Soil Blowout) |
| Not Applicable | Not Applicable | 12" Offset Between Shanks | Not Applicable | Not Applicable | Not Applicable | Not Applicable | 12" Offset Between Shanks | 12" Offset Between Shanks | Not Applicable | Not Applicable | Not Applicable | Not Applicable | 12" Offset Between Shanks | 12" Offset Between Shanks |